This article proposes a possible target environment for Microsoft Fabric Stage Files generator.
Installation and configuration of the target environment are not part of biGENIUS support.
Unfortunately, we won't be able to provide any help beyond this example in this article.
Many other configurations and installations are possible for a Microsoft Fabric Stage File target environment.
Below is a possible target environment setup for a Microsoft Fabric Stage Files generator.
The Property Target Platform should be set to the Fabric value:

Setup environment
You should have access to a Microsoft Fabric target environment:

You should also have access to an Azure DevOps git repository to later activate the git integration.
Enter the Synapse Data Engineering section:

The Synapse Data Engineering section is displayed:

Create a Workspace
Click on the Workspace entry in the left menu, then on + New workspace:

In this example, we will create a Workspace named bgfabricstagefiles.
Fill in the name and click on the Apply button:

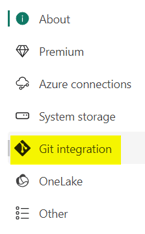
Now click on the Workspace settings menu to configure the git integration:

Choose the Git integration entry in the left menu:
Please prepare a clean new repository on Azure DevOps, for example, to store the Fabric files.
In the following example, the repository is docu-fabric-workspace.
Connect to your new Azure DevOps git repository, then click on the Connect and sync button:

Upload the source files
The source files should be uploaded in a Lake House.
Click on the New button and choose Lakehouse:
![]() >
> ![]()
In this example, we will call the Lake House docu_bglakehouse.
In the Files folder, click on the context menu and choose Upload > Upload folder:

For this example, we have:
- 6 Parquet source files organized inside six folders:

It is mandatory to have one folder per Parquet source file, and the folder name should be identical to the Parquet file name.
- 1 Delta source file:

It is mandatory to have one folder per Delta source file, and the folder name should be identical to the Source Model object name.
Upload Artifacts in Microsoft Fabric
Please now upload the generated Artifacts from the biGENIUS-X application to the Microsoft Fabric Workspace.
Please replace the placeholders before uploading the artifacts.
- Click on the Workspace we just created in the left menu:

- Click on the Import button and choose Notebook then From this computer:

- Click on the Upload button:

- Select all the generated artifacts from the folders Jupyter, Helpers and LoadControl:

- Import, in addition, the following helper:
In the file 500_Deploy_and_Load_DataVault_Fabric.ipynb, adapt the name of the XXX_Deployment, the XXX_SimpleLoadexecution, the XXX_MultithreadingLoadExecution, and the XXX_SelectResults by the name of your Helper files.
- Commit all the changes into your git repository by:
- Clicking on the Source control menu:

- Selecting all the changes:

- Clicking on the Commit button:

- Clicking on the Source control menu:
Depending on your load control environment:
- If you plan to use a native loaded control using multi-threading load, please create a Subfolder Dependencies in the folder Files and upload the dependencies file called
bg_XXXX_dependencies.json
If you have already discovered your source data, modeled your project, and generated the artifacts, you're now ready to replace the placeholders in your generated artifacts, deploy these artifacts, and subsequently load the data based on the Generator you are using with the following possible load controls: