
Applies to
Platform: Snowflake
Deploy the changes of a Snowflake DEV database to a PROD database that holds data, with Liquibase Community in Docker. Liquibase writes the differences of the tables as SQL files that you review and run in PROD, and a Python script exports the views and stored procedures of DEV. Afterwards PROD has the structure of DEV.
biGENIUS-X itself always deploys the complete solution, see Do a delta deployment.
Example environment
The article uses two databases of one Snowflake account, deployed from the same project:
- DEV,
<DEV database>: holds the new version, deployed and loaded. Compared with PROD, it adds the StageEMPLOYEE, renames the termLINETOTALof the satelliteORDERDETAILtoTOTAL, and no longer has the Stage and Reference TableCURRENCY. - PROD,
<PROD database>: holds the previous version with its loaded data.
Both are reached with key-pair authentication; the private key file is <key file>, for example C:\keys\snowflake_key.p8. The Snowflake - Target environment describes how to prepare the databases.
Prerequisites
Liquibase folder structure
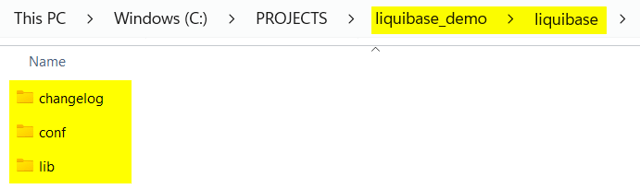
Create a folder, here liquibase_demo, with the subfolder liquibase and its subfolders changelog, conf and lib:
Drivers
Download these JAR files from Maven Central into lib: snowflake-jdbc, slf4j-api, slf4j-simple, bcprov-jdk18on and bcpkix-jdk18on. The commands below use snowflake-jdbc-4.0.0.jar, slf4j-api-2.0.9.jar, slf4j-simple-2.0.9.jar, bcprov-jdk18on-1.83.jar and bcpkix-jdk18on-1.83.jar. With other versions, adapt the file names in liquibase.properties and in the commands.
Properties
Create conf\snowflake-session.properties:
SESSION_PARAMETER_TIMESTAMP_TYPE_MAPPING=TIMESTAMP_TZ
TIMEZONE=UTC
Create conf\liquibase.properties. The target url is PROD, the reference is DEV:
# Target DB = PROD (where changes are applied)
url: jdbc:snowflake://<account host>.snowflakecomputing.com/?account=<account identifier>&db=<PROD database>&warehouse=<PROD warehouse>&role=<PROD role>&private_key_file=/liquibase/keys/snowflake_key.p8&private_key_file_pwd=<key passphrase>
username: <PROD user>

# Reference DB = DEV (source of truth)
referenceUrl: jdbc:snowflake://<account host>.snowflakecomputing.com/?account=<account identifier>&db=<DEV database>&warehouse=<DEV warehouse>&role=<DEV role>&private_key_file=/liquibase/keys/snowflake_key.p8&private_key_file_pwd=<key passphrase>
referenceUsername: <DEV user>

driver: net.snowflake.client.jdbc.SnowflakeDriver
classpath: /liquibase/internal/lib/snowflake-jdbc-4.0.0.jar:/liquibase/internal/lib/slf4j-api-2.0.9.jar:/liquibase/internal/lib/slf4j-simple-2.0.9.jar:/liquibase/internal/lib/bcprov-jdk18on-1.83.jar:/liquibase/internal/lib/bcpkix-jdk18on-1.83.jar
defaultSchemaName=LC

# Preserve exact Snowflake data types (mainly TIMESTAMP_TZ)
diffInclusionLevels=all
diffTypes=dataTypes,columns,tables,indexes,foreignkeys,primarykeys,uniqueconstraints,sequences
outputDefaultType=true
outputDefaultLength=true
outputDefaultPrecision=true
outputDefaultScale=true
driverPropertiesFile=/liquibase/conf/snowflake-session.properties
strictTypeComparison=true
typeAlias.TIMESTAMP_TZ=TIMESTAMP_TZ
Here <account host> is the host name part of your account URL, <account identifier> is <organization>-<account>, and <key passphrase> is the passphrase of the private key.
Python
Install Python and add it to PATH during the installation.
Generate the delta deployment scripts
Generate the scripts in three parts with the official Liquibase Docker image: all database objects except the views, then the views, then the stored procedures. Liquibase Community does not compare stored procedures and cannot read the original definition of views, so a Python script exports both.
All database objects except the views
- Open PowerShell 7 in
liquibase_demo. - Generate the changelog XML file for one schema, here
<layer schema>. Run the command once per schema; each run adds to the same file. With all schemas in one run, the comparison takes very long.docker run --rm ` -v "<key file>:/liquibase/keys/snowflake_key.p8:ro" ` -v "$PWD\liquibase\conf:/liquibase/conf:ro" ` -v "$PWD\liquibase\changelog:/liquibase/changelog" ` -v "$PWD\liquibase\lib\snowflake-jdbc-4.0.0.jar:/liquibase/internal/lib/snowflake-jdbc-4.0.0.jar:ro" ` -v "$PWD\liquibase\lib\slf4j-api-2.0.9.jar:/liquibase/internal/lib/slf4j-api-2.0.9.jar:ro" ` -v "$PWD\liquibase\lib\slf4j-simple-2.0.9.jar:/liquibase/internal/lib/slf4j-simple-2.0.9.jar:ro" ` -v "$PWD\liquibase\lib\bcprov-jdk18on-1.83.jar:/liquibase/internal/lib/bcprov-jdk18on-1.83.jar:ro" ` -v "$PWD\liquibase\lib\bcpkix-jdk18on-1.83.jar:/liquibase/internal/lib/bcpkix-jdk18on-1.83.jar:ro" ` -e JAVA_OPTS='-Dnet.snowflake.jdbc.enableBouncyCastle=true' ` liquibase/liquibase:5.0.1 ` --defaultsFile=/liquibase/conf/liquibase.properties ` --changeLogFile=/liquibase/changelog/dev_to_prod_all_except_views.xml ` --schemas=<layer schema> --referenceSchemas=<layer schema> ` --includeSchema=true --outputDefaultSchema=true --log-level=info ` --diffTypes=tables,columns,indexes,foreignkeys,primarykeys,uniqueconstraints,sequences ` diffChangeLog
The run ends withLiquibase command 'diffChangelog' was executed successfully.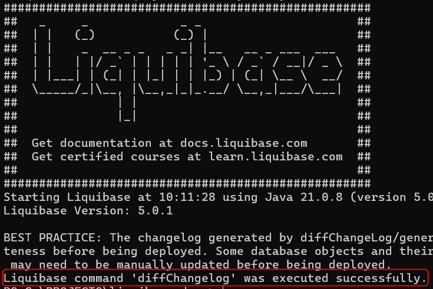
- Check that
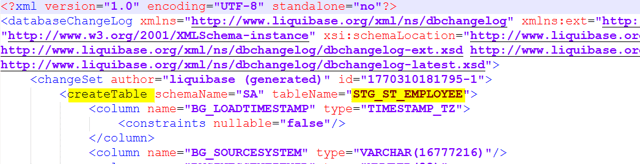
changelog\dev_to_prod_all_except_views.xmllists the changes, for example acreateTablefor the new Stage: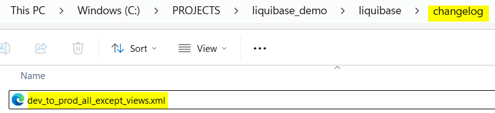
- Download fix_timestamp_tz.ps1 and run it on the file:
.\fix_timestamp_tz.ps1 -changelogFile "$PWD\liquibase\changelog\dev_to_prod_all_except_views.xml". The script changes every timestamp column type in the file toTIMESTAMP_TZ, because the Liquibase Snowflake driver writes noTIMESTAMP_TZtypes. - Generate the SQL file. Use the same
docker runoptions up to the image name, followed by:--defaultsFile=/liquibase/conf/liquibase.properties ` --changeLogFile=dev_to_prod_all_except_views.xml ` --schemas=<schemas> --outputDefaultSchema=true ` updateSQL > liquibase\changelog\dev_to_prod_all_except_views.sql
Here<schemas>lists the schemas of the first step, for exampleSA,RDV,BV. The run ends withLiquibase command 'updateSql' was executed successfully.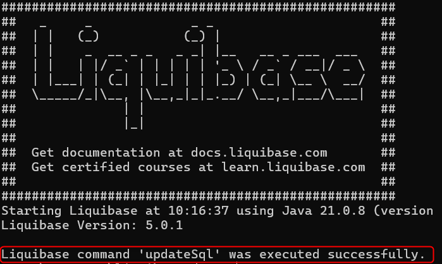
- Open
dev_to_prod_all_except_views.sqland delete the warning lines at its beginning. The file contains, for example,CREATE TABLE <PROD database>.SA.STG_ST_EMPLOYEEfor the new Stage.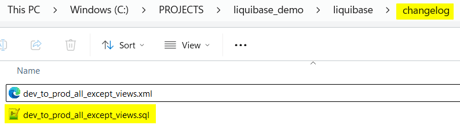
- Review each statement.
Liquibase compares structures only. It writes a renamed column as a dropped and an added column, and it drops tables and columns that exist only in PROD; their data is lost. Review the generated SQL files and back up the PROD database before you run them.
Views and stored procedures
- Download export_snowflake_views_or_procedures.py into
liquibase_demo.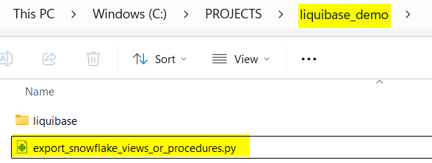
- Set the values in
CONFIGfor your Snowflake environment, includingprod_database,schemasandoutput_dir, and set the passphrase of the private key in the environment variableSNOWFLAKE_PRIVATE_KEY_PASSPHRASE. - Install the Snowflake connector:
pip install snowflake-connector-python. - Run
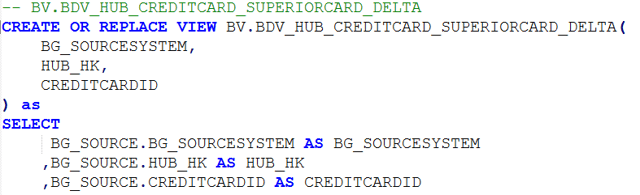
python .\export_snowflake_views_or_procedures.py views. The script writesviews_to_deploy_prod.sqlwith every view of the DEV schemas, with the DEV database name replaced byprod_database.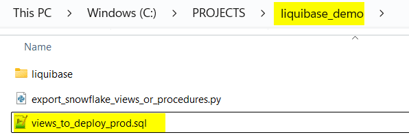
- Run
python .\export_snowflake_views_or_procedures.py procedures. The script writesprocedures_to_deploy_prod.sqlwith every stored procedure, asCREATE OR REPLACE PROCEDURE <PROD database>.<layer schema>.<procedure>.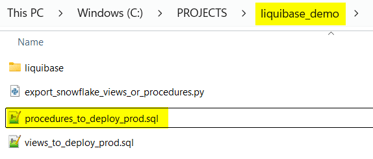
Run the delta deployment
Run the files in PROD in this order:
- Run
procedures_to_deploy_prod.sql. - Drop the tasks of the project's load control schema. List them with
SHOW TASKS IN SCHEMA <PROD database>.<load control schema>;, then generate the drop statements and run them:SELECT 'DROP TASK IF EXISTS ' || "database_name" || '.' || "schema_name" || '."' || "name" || '";' FROM TABLE(RESULT_SCAN(LAST_QUERY_ID()));
- Generate the project, replace the placeholders with the PROD values, and run
LoadControl\snowflake_depending_tasks.sqlin PROD, or the task script of your load control option. With Generate Drop Load Control Schema selected, the script first drops the load control schema with all objects in it. - Run
dev_to_prod_all_except_views.sql. - Run
views_to_deploy_prod.sql. Views that use other views fail when those come later in the file, so run it again until no error remains. - Drop the views and stored procedures of deleted model objects by name, for example the loader of
CURRENCY. The export creates or replaces objects; it does not drop any.
Check the result
Load PROD, for example as described in Snowflake - Load data - Native Load Control, and check that every task succeeds and that the tables keep their earlier rows.