This article proposes a possible target environment for Fabric Warehouse generators.
Installation and configuration of the target environment are not part of biGENIUS support.
Unfortunately, we won't be able to provide any help beyond this example in this article.
Many other configurations and installations are possible for a Microsoft Fabric Warehouse target environment.
Below is a possible target environment setup for a Fabric Warehouse generator.
Setup environment
You should have access to a Fabric Warehouse target environment:

To activate the git integration later, you should also have access to an Azure DevOps git repository.
Prerequisites
To be able to execute SQL code in a Fabric Warehouse, you must use Azure Key Vault.
More details about how to use Key Vault are available here.
Create a new Key Vault and the following secrets:
- client-id: You can find it in your Azure Enterprise application. It is the application ID:

- client-secret: You can find it during your Azure Enterprise application creation.
- tenant-id: you can find it in Fabric by clicking under your profile picture in the top right-hand side, then hovering over the i icon near the Tenant name:

Create a Workspace
Click on the Workspace option in the left menu, then on + New workspace:

In this example, we will create a Workspace named bgDocumentationWarehouse.
Fill in the name and click on the Apply button:

Service principal (SPN) access to Fabric Data Warehouses requires tenant-level and workspace-level permissions that are often not set by default.
To set them, please add to your Workspace a user with the Service Principal level:
- Click on the Manage Access button:

- The Manage access pop-up opens:

- Click on the Add people or groups button:

- Search the user with the Service Principal level and add it as a Member:

- You now have it set:

Now, let's configure the git integration:
-
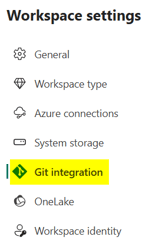
Click on the Workspace settings button:

-
Choose the Git integration option in the left menu:
-
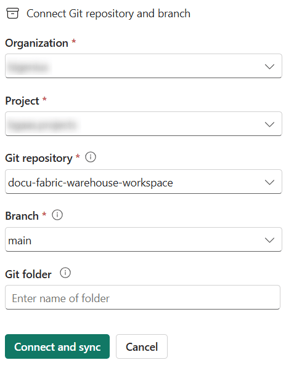
Connect to your Azure DevOps git repository, then click on the Connect and sync button:
Source data
There is one way to provide source data to a Microsoft Fabric Warehouse generator:
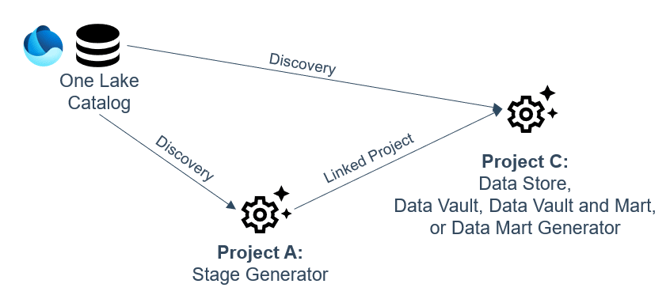
- From a One Lake Catalog by:
- using a direct Discovery in a dedicated Project using the Generator Configuration Microsoft Fabric Warehouse Stage, Data Store, Data Vault, Data Vault and Mart, or Data Mart
- using the Fabric Lakehouse Stage generator as a Linked Project in a dedicated Project using the Generator Configuration Microsoft Fabric Warehouse Stage
One Lake Catalog
If your source data is stored in a One Lake Catalog, please:
- Direct access:
- Create a Project with the Fabric Warehouse Data Store, Data Vault, Data Vault and Mart, or Data Mart generator.
- In this Project, discover the One Lake Catalog, create the Stage Model Object, and use it.
- Access through a linked project:
- Create a first Project with the Fabric Lakehouse Stage generator
- In this first Project, discover the One Lake Catalog, create the Stage Model Object, generate, deploy, and load data in a Warehouse.
- Create a second Project with the Fabric Warehouse Data Store, Data Vault, Data Vault and Mart, or Data Mart generator.
- In this second Project, use the first Project Stage Model Object as a source by using the Linked Project feature.
To access a One Lake catalog from a Warehouse, you may create:
-
A Lakehouse shortcut:
-
Click on the New item button and choose Lakehouse:
 >
> 
-
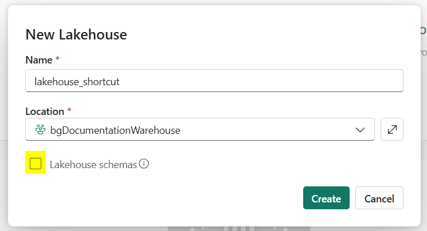
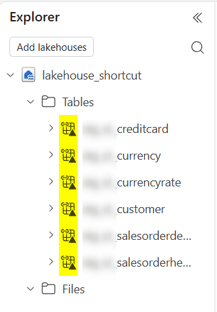
In this example, we will call the Lakehouse lakehouse_shortcut.
-
Uncheck the Lakehouse schemas option; it is currently not supported.
-
-
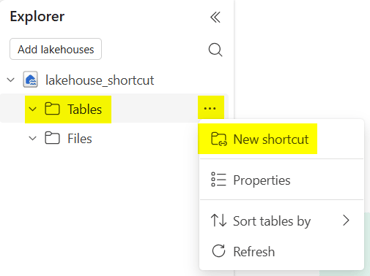
In the Tables folder, click on the context menu and choose New shortcut:
-
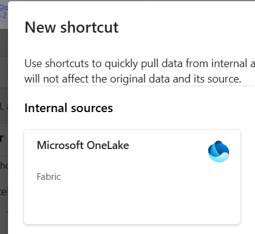
Select Microsoft OneLake:
-
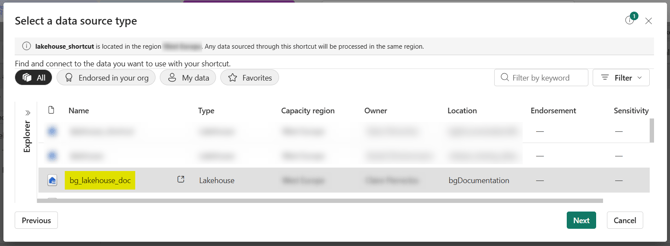
Select the Lakehouse where your source data is located:
-
-
- Click on the Next button.
-
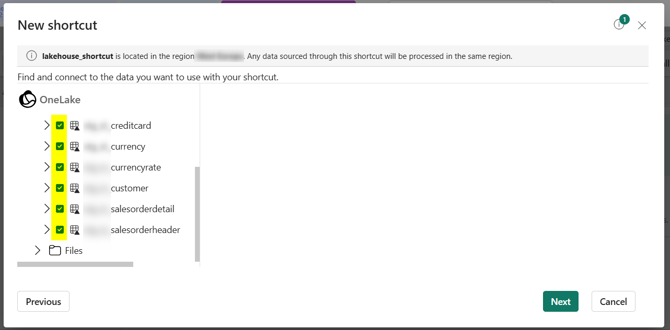
Select your source data:
-
- Click on the Next button, then on the Create button.
-
Your source data are now shortcutted in your Workspace:

- Click on the Next button, then on the Create button.
- Your source data are now shortcutted in your Workspace:
- A Warehouse:
-
Click on the New item button and choose Lakehouse:
 >
> 
- In this example, we call the Warehouse docu_bgwarehouse.
-
Upload Artifacts in Microsoft Fabric
There are 2 possibilities to upload the generated artifacts:
- Using the deploy.ps1 helper (recommended)
- Manually
Please replace the placeholders before uploading the artifacts.
Upload with the deploy.ps1 helper
To use the deploy.ps1 helper to upload the generated artifacts:
- Install the Az.Accounts PowerShell module, which provides cmdlets for managing Azure user accounts, subscriptions, and authentication in Azure Resource Manager:
- Open Powershell
- Execute the following command:
Install-Module -Name Az.Accounts
- To use the deploy.ps1 helper, you will need the following information:
- Workspace name: name of the Fabric workspace where to upload the artifacts
- Service principle user name: your user name in Fabric (email)
- Password: your password
- Azure tenant ID: it is the tenant-id value in your Key Vault (check the prerequisites chapter)
- Subscription ID: you can find it by signing into the Azure portal, then navigating to the "Subscriptions" section under Azure services

- Open Powershell and execute the deploy.ps1 script:
- Enter the workspace name:

- Enter the workspace name:
-
- Enter the service principle user name:

- Enter the service principle user name:
-
- Enter the password:

- Enter the Azure tenant ID:

- Enter the Subscription ID:

- You need to sign in with your Azure credentials:

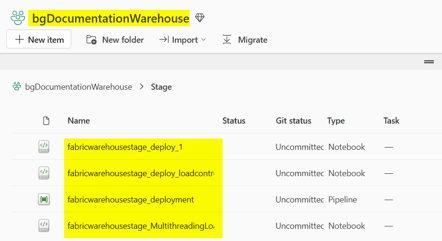
- All the artifacts are uploaded to your Fabric workspace:
- Enter the password:
Manual upload
To manually upload the generated Artifacts from the biGENIUS-X application to the Fabric Workspace:
- Click on the Workspace we just created in the left menu:

- Click on the Import button and choose Notebook, then From this computer:

- Click on the Upload button:

- Select all the generated artifacts from the folders Jupyter, Helpers, and LoadControl:

Git integration
Commit all the changes into your git repository by:- Clicking on the Source control menu:

- Selecting all the changes:

- Clicking on the Commit button:

If you have already discovered your source data, modeled your project, and generated the artifacts, you're now ready to replace the placeholders in your generated artifacts, deploy these artifacts, and subsequently load the data based on the Generator you are using, with the following possible load controls: